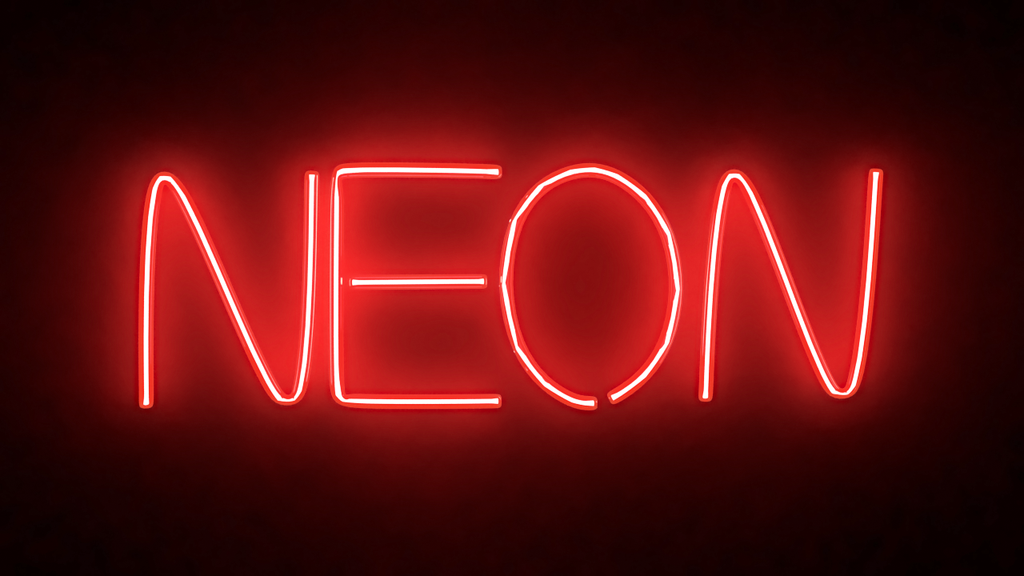
Today we will be creating a cool looking neon sign. Neon signs were extremely popular in the US from 1920-1960. These days you will still find many stores use neon “open”- signs and especially a lot of “Las Vegas”-signs are neon lights.
The way a neon sign works is that a custom shaped glass tube is filled with gas. Then when the gas is electrified it starts to glow. To create different colors you simply have to tint the glass with the color you want. (Short summary based on the Wikipedia article)
To create realistic neon light in Maya we are only allowed to model glass tubes and we need to create two things, a representation of the gas and the glass tube. First, we will model the light using “Bezier-Curves” and “Poly-Extrude”. To render the light we will be taking a look at the mental ray “mia-light-surface” Texture and “object-light” Shader.
Modelling
Step 1
Create your sign using the “Bezier Curve Tool”. For each letter create a new curve. Consider the limitations of glass tubes. Some letters, like “E”, cannot be completed in a single stroke, for these use multiple tubes/curves are required. Other letters like “O” cannot be perfectly round since the glass tube needs to go back to the electrodes. (Of course skip duplicate letters)
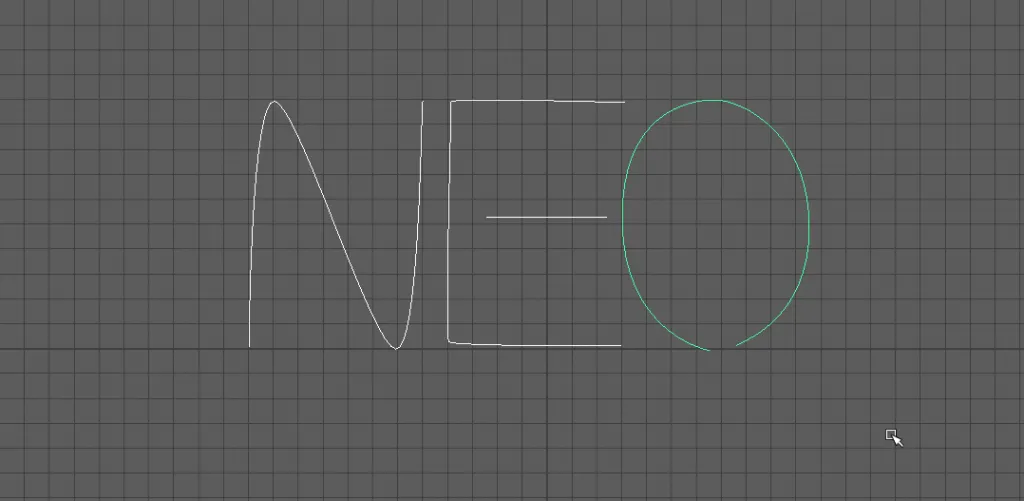
Step 2
Create a Poly Cylinder (Subdivision Axis 8) and set the radius to whatever thickness you need your light to be. Duplicate it for each curve you have and position it at the beginning of the curves.
Step 3
Select the top faces and the curve and Extrude (Ctrl-E). In most cases, you will need to add divisions so the geometry looks correct. (In some cases you will need to manually adjust the vertex points to get a good result) \
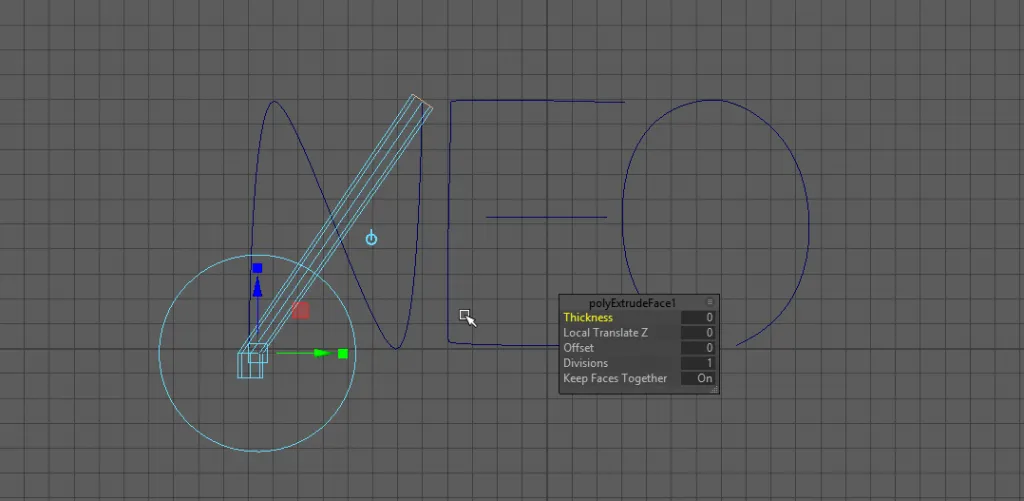 Divisions 1, too little to define the shape
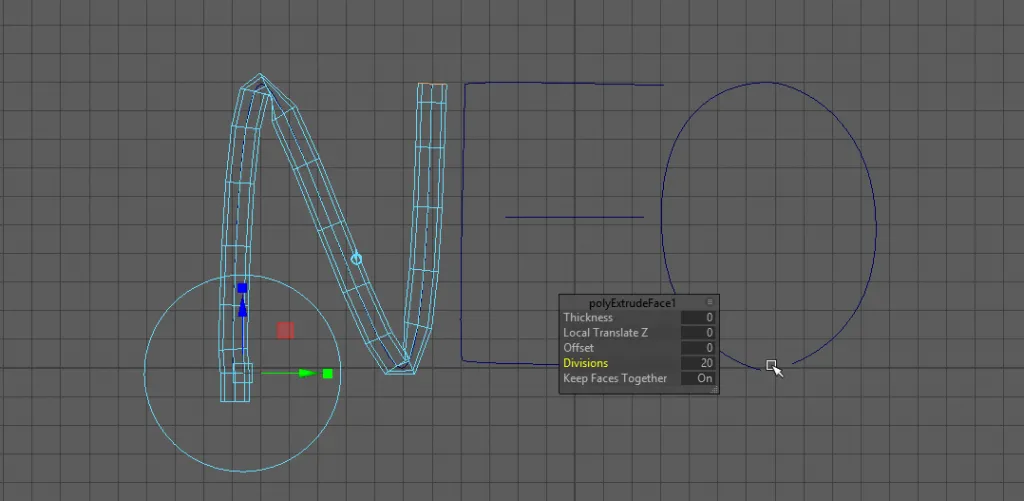 Divisions 20: Enough to define the shape, some manual adjustment needed to improve the geometry[/caption]
Step 4
Select all geometry and select Mesh > Combine.
Step 5
Select all faces and Extrude (Ctrl-E) with a thickness of 0.2.
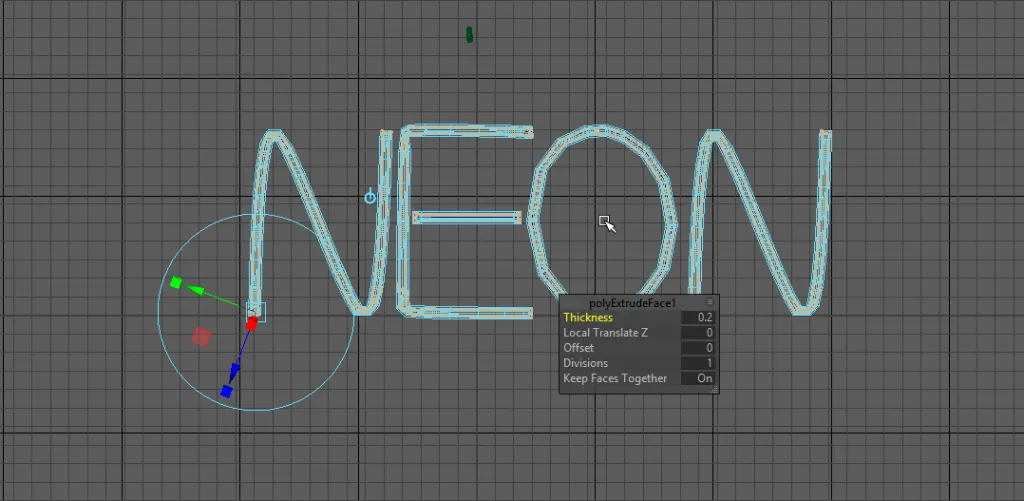 Step 6
Without deselecting the faces Edit Mesh > Duplicate Faces. This is our “gas”-geometry.
Shading
Glass-Material
Step 1
Create and assign a “mia_material_x” material. From the Presets select “Glass_Physical”
Step 2
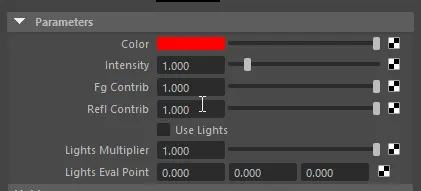
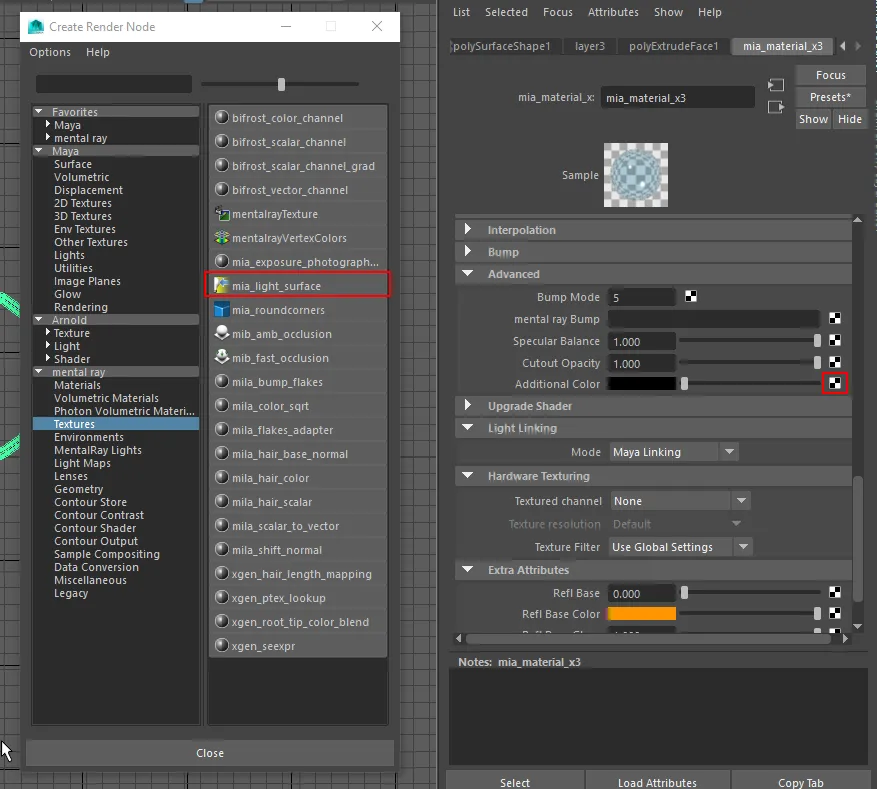
In the Attribute Editor go to “Advanced” and connect a “mia_light_surface”.
Step 3
Set the values to:
- Color: Red (or whatever you need)
- Fg Contrib: 1.0 (or higher Values like 5.0, increases the glow distance)
- Refl Contrib: Same as Fg Contrib
Gas-Material
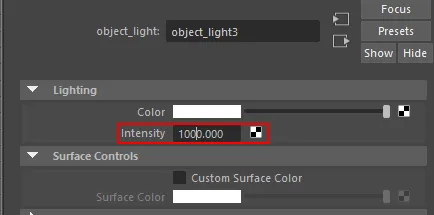
Create and assign to the “gas” component a mental ray “object_light” shader. Set the intensity to 1000.
 Rendering
Step 1
If you do not have an environment you will not see the glow effect. For my simple render, I just used a simple Poly Plane with a black Lambert as the environment.
Step 2
Set up your Render_Cam.
Step 3
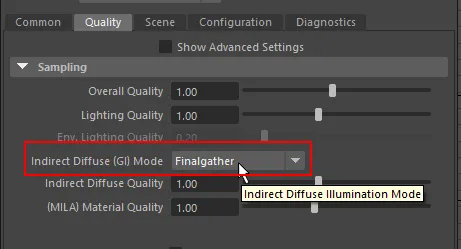
In the Render Settings, Quality-Tab enables Final Gather.
Last Step
Render your awesome neon lamp.

About Neal Burger
Neal Burger is a successful entrepreuner. He is the founder of Acme Inc, a bootstrapped business that builds affordable SaaS tools for local news, indie publishers, and other small businesses.

