

Please note that the original source of this guide is a video tutorial published on the official Arnold Rendering blog by Lee Griggs. This document serves purely as a structured, written walkthrough of that video, capturing the exact node configurations, shading parameters, and utility adjustments required to recreate the look natively in Maya.
Step 1: Set Up the Arnold Render Settings
Before any toon lines can render, Arnold requires its sampling filter to be switched from photo-smoothing to vector line calculation.
- Open the Render Settings window in Maya.
- Under the Render Using dropdown, choose Arnold Renderer.
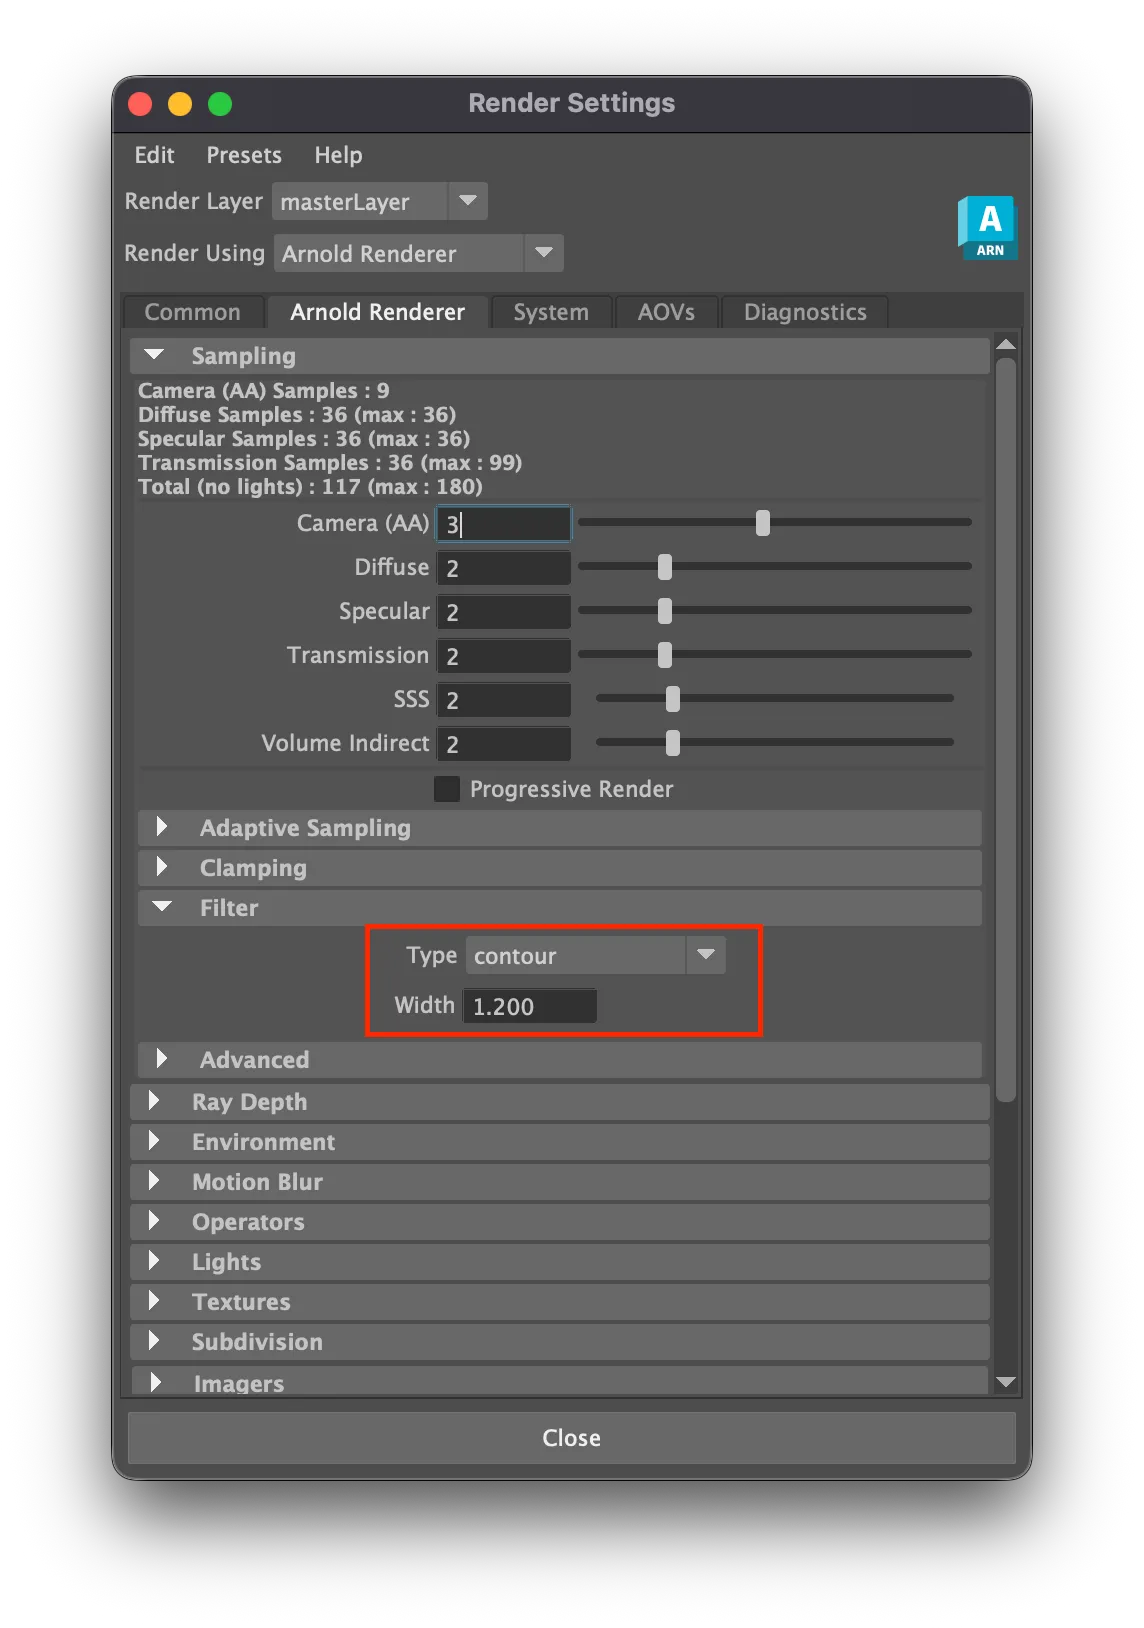
- Select the Arnold Renderer tab and scroll down to the Filter section.
- Change the Type dropdown from
gaussiantocontour. - Set the Width to
1.0
Step 2: Create and Assign the Base Toon Material
- Open the Hypershade window (
Windows > Rendering Editors > Hypershade). - In the Create tab, search for and click on
aiToonto generate the node. - Select your 3D model in the viewport.
- Right-click your new
aiToonnode in the Hypershade and select Assign Material to Selection.
Step 3: Configure the Technical Illustration Shading
Technical drawings typically favor minimal shading (flat colors or simple gradients) rather than soft photorealistic shadows.
-
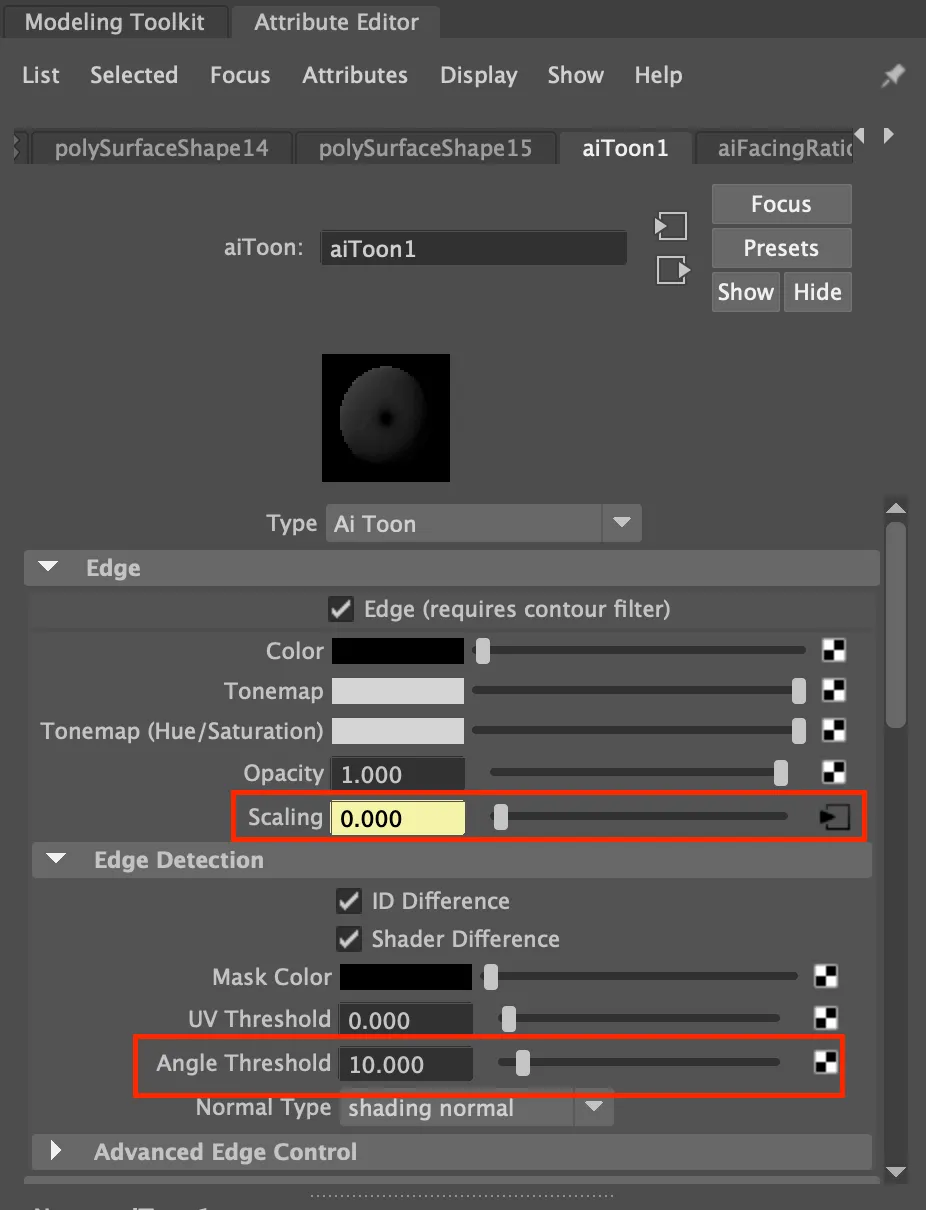
Edge Detection: Look under the Edge Detection dropdown in the
aiToonnode attributes and set the Angle Threshold to10. This low value forces lines to form on even slight geometric variations. -
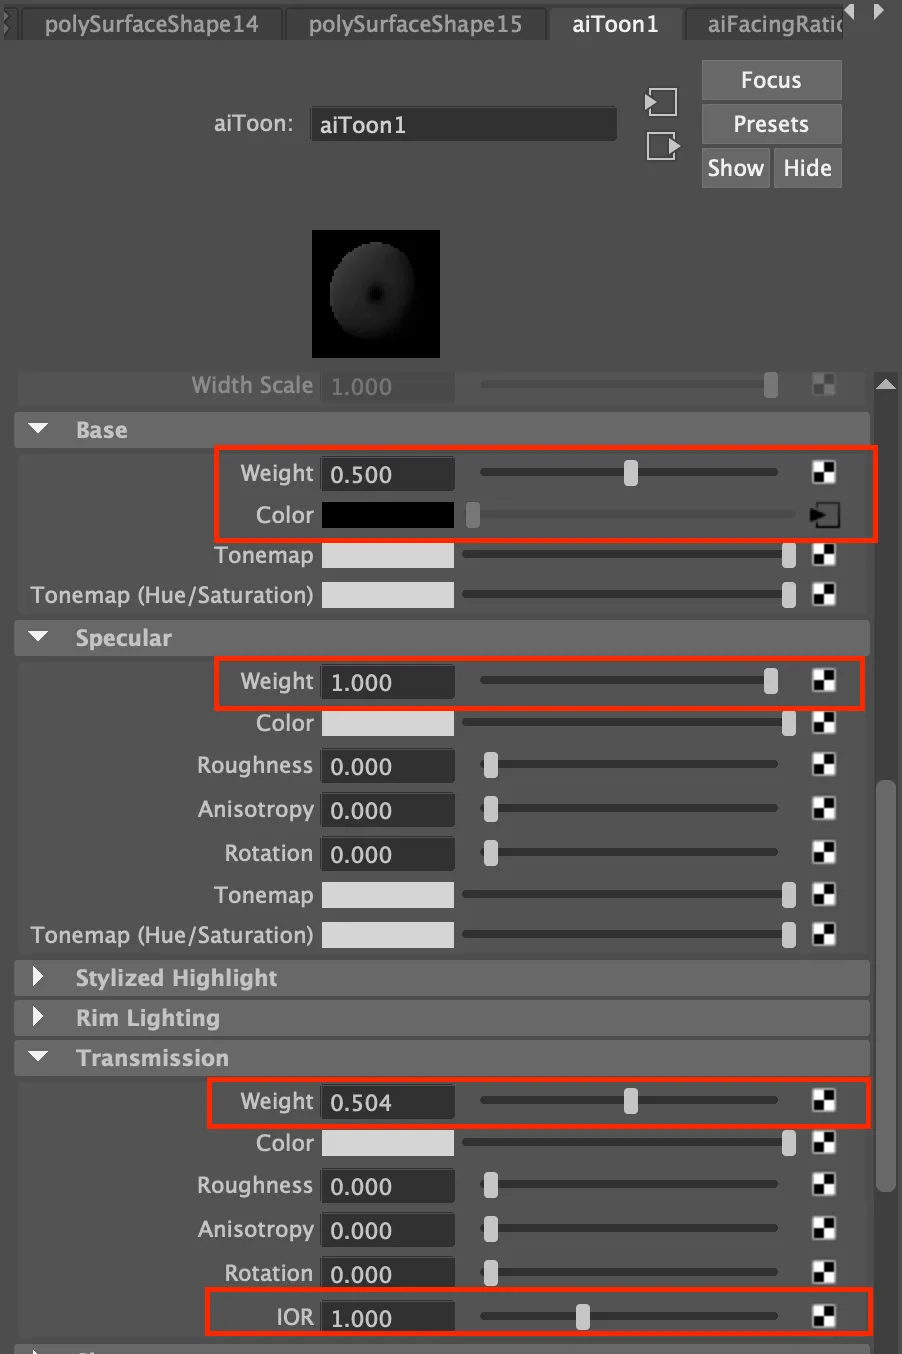
Base: Set Weight to
0.5. -
Specular: Set Weight to
1.0to retain clean highlight reflections. -
Transmission: Set Weight to
0.5and the IOR (Index of Refraction) to1.0to prevent refractive distortion through the mesh. -
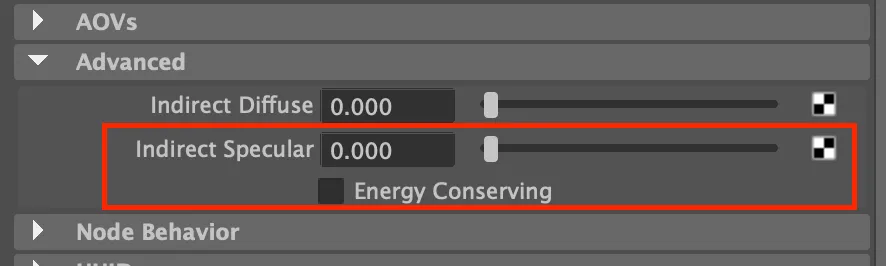
Advanced: Scroll to the Advanced block. Set Indirect Specular to
0.0and Disable Energy Conserving (uncheck it) to allow for flat, stylized value scaling. -
Utility Connections:
- Create an
aiFacingRatioutility node in your Hypershade. - Connect the output of the
aiFacingRatiointo theaiToonEdge > Scaling attribute to dynamically vary line thickness based on camera angle. - In the
aiFacingRatiosettings, set the Bias to a low value and the Gain to a higher value. (Note: A value of 0.5 has no effect; sliding the gain value lower increases the overall contrast). - Connect that exact same
aiFacingRatiooutput directly into theaiToonBase > Color attribute to create a consistent, view-dependent fallback shading value.- - (Optional) Play with the
InvertSetting if you like the look more.
- Create an
 \
\
Step 4: Refine Parameters
- Go back to the Render Settings window in Maya and adjust the Width Value to your liking.
- Go to the
aiFacingRatioutility node and Adjust the Gain and Bias - (Optional) Play with color combinations like white lines and blue base.
Creative Applications & Practice Challenges
Task 1: The Exploded Assembly View (Beginner)
- Goal: Create a clean, dual-tone manual diagram.
- Directions: Import a multi-part mechanical model (like a gear assembly, an engine piston, or a mechanical pen). Disassemble the individual objects slightly along a clean linear axis. Apply the exact step-by-step setup above, using a pure white background and deep grey contours to simulate a classic assembly line print.
Task 2: Translucent CAD Schematic (Intermediate)
- Goal: Master look-through rendering using transmission controls.
- Directions: Take a hard-surface asset featuring internal mechanics (like a watch casing or a computer mouse). Use the low
Angle Threshold: 10settings alongside theTransmission: 0.5setting configured in Step 3. Tweak the transparency values until the outer protective shell is clearly outlined but faint enough to see the inner mechanical components running underneath it.

About Neal Burger
Neal Burger is a successful entrepreuner. He is the founder of Acme Inc, a bootstrapped business that builds affordable SaaS tools for local news, indie publishers, and other small businesses.